
I love love love how the house is coming together. I created the valences for our bedroom and then got all ambitious to do them for the living room, but FIRST, you have to see the room put together!
I got the canvas for Christmas and it is a PERFECT match to our green and purple theme. It is called plum forest and could not have matched better if I painted it myself.

I then spend a Friday at JoAnn Fabric and discovered the most perfect fabric EVER. They will match the chair perfectly. The colors match the walls and furniture and I am just in love.
Simple valences I hemmed the 2 short sides, then the long bottom. I then did a 1 3/4" hem to allow for the curtain rod to be pushed through.
Made one for our 72" front window and then the small 24" window on the side. Love.

The burlap wreath looks wonderful on the door! I am going with a natural/burlap theme for the house apparently. I am a fan of browns apparently.

I then finished taking down my holiday decorations. I wanted to do a Valentine's Day themed mantle. I went with a natural theme as well some pops of red and things I have gotten over the years.
My chalkboard covers the thermostat. Little statue on the left was on our gift table at our wedding.
Always & Forever sign I bought a few years ago because I have always signed my cards, letters, and emails with "Always & Forever." It looks awesome!
The lanterns were Christmas presents. Right now they are empty, but I am looking at finding things to fill them seasonally at some point.
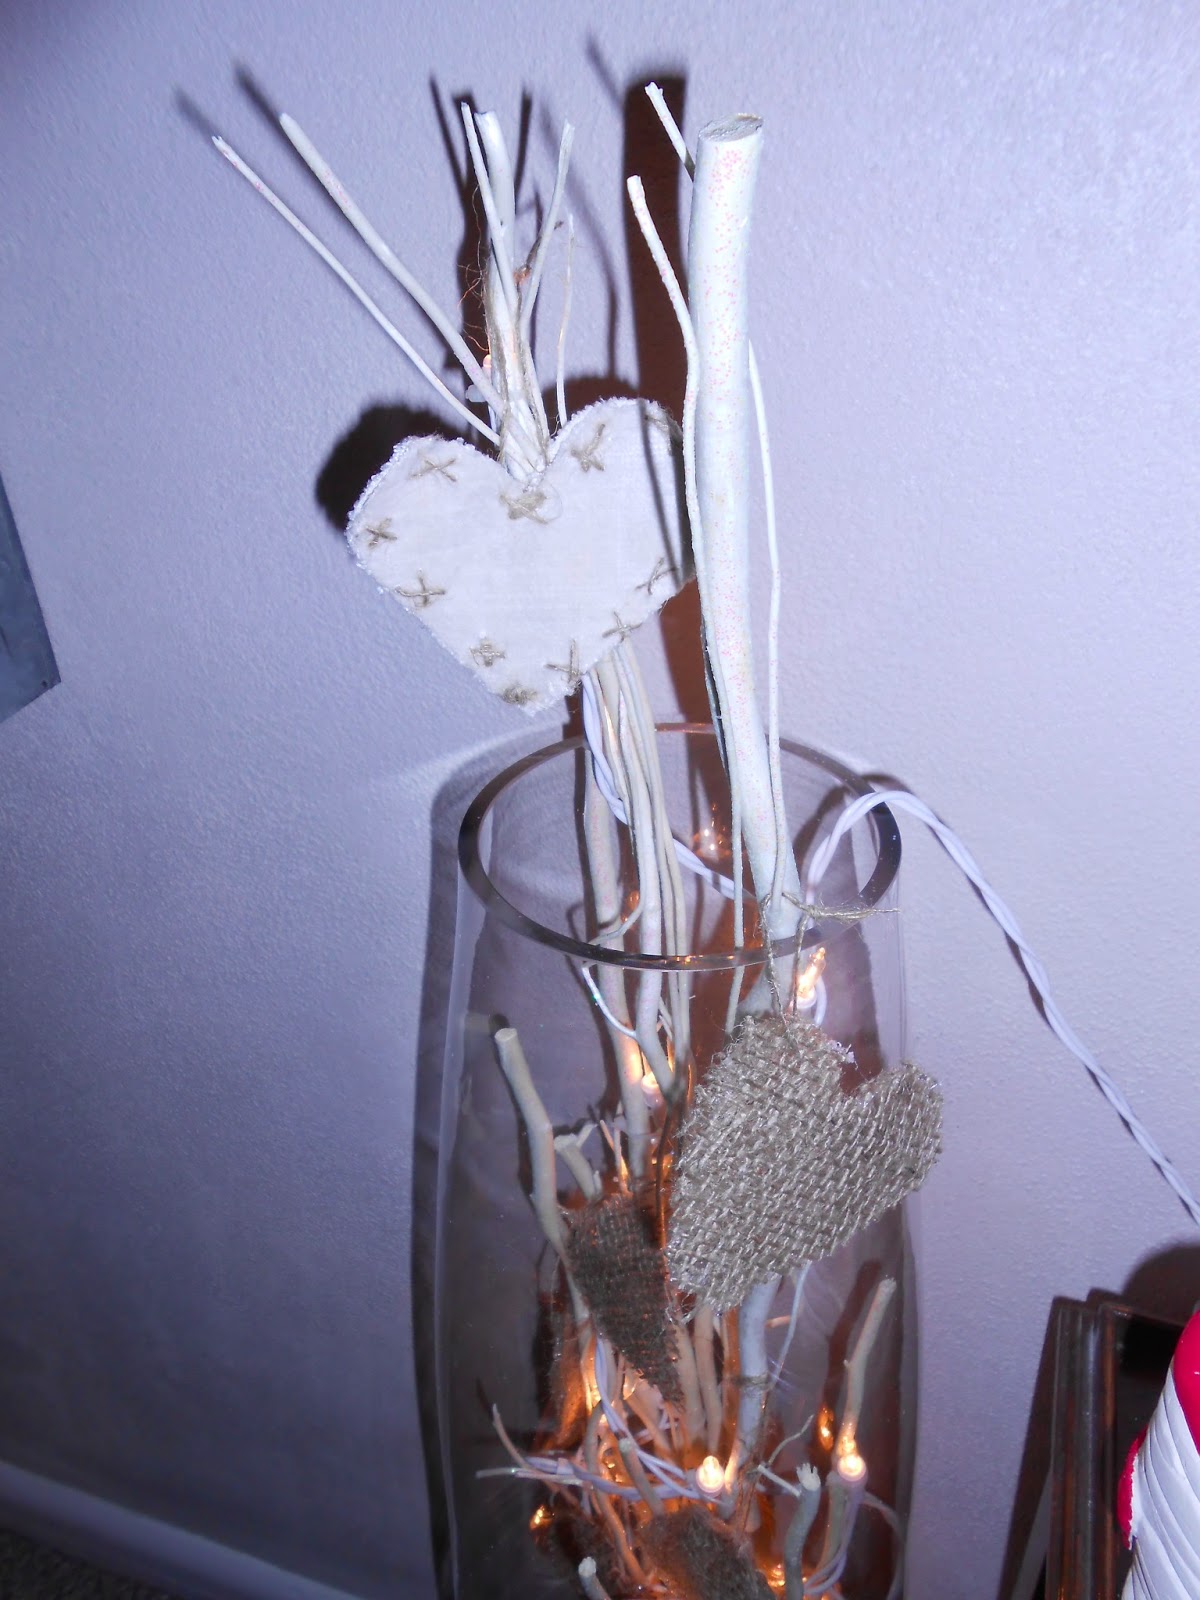
 The vases on the floor I have been changing seasonally. I had bought white pre-lit/glitter trees after christmas. I put them in there and then decided they needed a more valentines look. That is when I decided to bust out some of my burlap to make hearts.
The hearts were pretty easy to make and my pictures are kind of crappy, but I thought I would give a step by step to make them...

1. Lay to pieces of burlap on top of each other. I was using scraps to get as much as I can out of the burlap I have.

2. Cut out a heart so you have two pieces of identical burlap hearts.

3. Keep the hearts on top of each other. To keep the sides from fraying I thought of hot gluing the sides, and then I was going to sew.
I left the hearts together, and squeezed minimal hot glue between the pieces. I pulled the sides of the heart taught to press the pieces of burlap together without touching it. I then while the glue was warm, but not hot enough to burn, I would tuck the "straggling pieces" into the glue for a clean line around the border of the burlap.
 4. I then pulled a strand of the burlap out of another extra pieces of burlap.
5. I threaded the burlap string onto a BIG quilters' needle.

6. Below the glue line I put the needle through and pulled one side of the string through.

 7. Tie the string off for a hanging string.
Done!
The white hear on top was also a plan, but after it being way more work than I thought it would be, I only made two, one for the top of each tree. It wasn't hard work, just more than the burlap.
1. Cut a heart out of white fabric layered on top of each other as you did for the burlap.
2. Pull a string out of the burlap again.
3. Thread the burlap string onto the quilters' needle. Knot one end.
4. Stitch x's around the border of the heart. Before you put the last x on, stuff the heart with extra fabric, burlap what ever you have to make it a little puffy.
5. do your last x and tie the burlap off. (NOTE: I did run out of burlap string often. Tie of the string you had. Make a knot and start the next set of x's. Make sure to knot/tie off each strong before doing the next)

On the mantle, I have some wine bottles I doctored up a little. With ideas from pinterest, I set out to make my wine bottles something fit for a mantle.
The bottle on the right: A brown/natural colored yarn, wrapped around the bottle hot glued every few wraps.
This one was really simple. I bought one set of natural wood vase fillers. They were in our fall mantle, and now I pulled a couple sprigs to put in the wine bottle.

 Under the mantle is a heart shaped pot. Alex, my adorable husband, took all AP and college courses his senior year of high school. To try and lighten part of his work load, he took a freshman art class. Turns out, art was not his forte and it was one of the hardest classes he had that semester....oops! As a part of that art class, he had a clay unit. This was his creation. It has gone with me to every house we have lived in and it was PERFECT for our Valentine's day look! I am thinking of making a rose pomander to put in it to make it look finished rather than a pot sitting on our shelf, but the story behind it still just makes me smile each time I see it!
 The Valentine's Chalk Board: I am still just on my white chalk, but have purchased some colored chalk for future boards. I found on Pinterest to write "Love" with out picking up your writing utensil. I wanted to try it. I wrote love first....and then thought of this cute quote. Then played with my heart making skills, and just have fun with it. :)
For the LOVE: cursive L, the tail going up to the inside of the little "e" and then out to the outside of the "e." Curve it back to make a "v" and then loop it off for the "o"!!
|
| Our natural, burlap Valentine's Day! |
No comments:
Post a Comment