Saturday, January 26, 2013

More DIY!


I love love love how the house is coming together.  I created the valences for our bedroom and then got all ambitious to do them for the living room, but FIRST, you have to see the room put together!

I got the canvas for Christmas and it is a PERFECT match to our green and purple theme.  It is called plum forest and could not have matched better if I painted it myself.


 Now for the living room curtains   I had just bought a script chair, and was IN LOVE.

I then spend a Friday at JoAnn Fabric and discovered the most perfect fabric EVER.  They will match the chair perfectly.  The colors match the walls and furniture and I am just in love.

Simple valences I hemmed the 2 short sides, then the long bottom.  I then did a 1 3/4" hem to allow for the curtain rod to be pushed through.

Made one for our 72" front window and then the small 24" window on the side.  Love. 


The burlap wreath looks wonderful on the door!  I am going with a natural/burlap theme for the house apparently. I am a fan of browns apparently.  

I then finished taking down my holiday decorations.  I wanted to do a Valentine's Day themed mantle. I went with a natural theme as well some pops of red and things I have gotten over the years.  

My chalkboard covers the thermostat.  Little statue on the left was on our gift table at our wedding.  

Always & Forever sign I bought a few years ago because I have always signed my cards, letters, and emails with "Always & Forever."  It looks awesome!

The lanterns were Christmas presents.  Right now they are empty, but I am looking at finding things to fill them seasonally at some point.


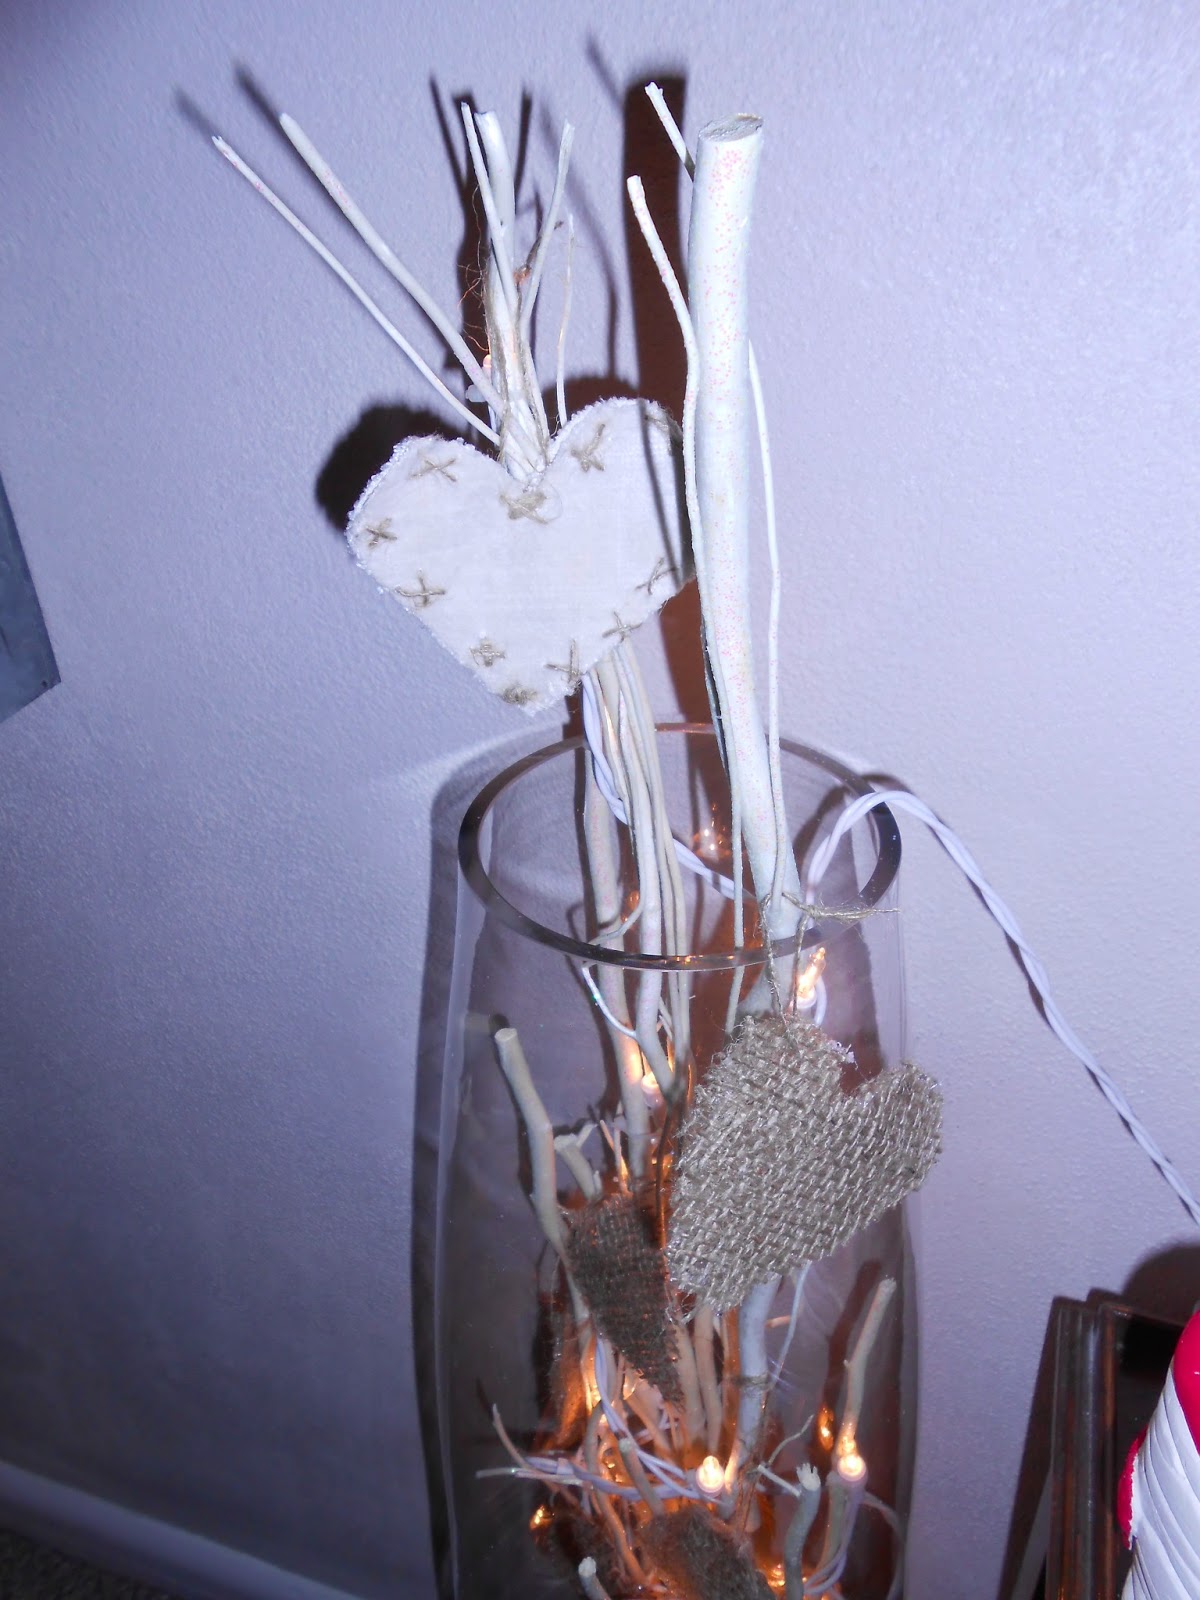
The vases on the floor I have been changing seasonally.  I had bought white pre-lit/glitter trees after christmas.  I put them in there and then decided they needed a more valentines look.  That is when I decided to bust out some of my burlap to make hearts.

The hearts were pretty easy to make and my pictures are kind of crappy, but I thought I would give a step by step to make them...

1. Lay to pieces of burlap on top of each other.  I was using scraps to get as much as I can out of the burlap I have.  

2. Cut out a heart so you have two pieces of identical burlap hearts.  

3. Keep the hearts on top of each other.  To keep the sides from fraying I thought of hot gluing the sides, and then I was going to sew.

I left the hearts together, and squeezed minimal hot glue between the pieces.  I pulled the sides of the heart taught to press the pieces of burlap together without touching it.  I then while the glue was warm, but not hot enough to burn, I would tuck the "straggling pieces" into the glue for a clean line around the border of the burlap.

4. I then pulled a strand of the burlap out of another extra pieces of burlap.

5. I threaded the burlap string onto a BIG quilters' needle.  

6. Below the glue line I put the needle through and pulled one side of the string through.

7. Tie the string off for a hanging string.  


Done!

The white hear on top was also a  plan, but after it being way more work than I thought it would be, I only made two, one for the top of each tree.    It wasn't hard work, just more than the burlap.

1.  Cut a heart out of white fabric layered on top of each other as you did for the burlap.
2. Pull a string out of the burlap again.  
3. Thread the burlap string onto the quilters' needle.  Knot one end.
4. Stitch x's around the border of the  heart.  Before you  put the last x on, stuff the heart with extra fabric, burlap what ever you have to make it a little puffy.  
5. do your last x and tie the burlap off.  (NOTE: I did run out of burlap string often.  Tie of the string you had.  Make a knot and start the next set of x's.  Make sure to knot/tie off each strong before doing the next)

On the mantle, I have some wine bottles I doctored up a little.  With ideas from pinterest, I set out to make my wine bottles something fit for a mantle.  


The bottle on the left: Twine wrapped around the wine bottle, hot glued every few wraps.  The flowers are "sola shell flowers" available on save-on-crafts.com.  Inside is actually our wedding cake topper.

The bottle on the right: A brown/natural colored yarn, wrapped around the bottle hot glued every few wraps.

This one was really simple.  I bought one set of natural  wood vase fillers. They were in our fall mantle, and now I pulled a couple sprigs to put in the wine bottle.

Under the mantle is a heart shaped pot.  Alex, my adorable husband, took all AP and college courses his senior year of high school.  To try and lighten part of his work load, he took a freshman art class.  Turns out, art was not his forte and it was one of the hardest classes he had that semester....oops!  As a part of that art class, he had a clay unit.  This was his creation.  It has gone with me to every house we have lived in and it was PERFECT for our Valentine's day look!  I am thinking of making a rose pomander to put in it to make it look finished rather than a pot sitting on our shelf, but the story behind it still just makes me smile each time I see it!

 The Valentine's Chalk Board:  I am still just on my white chalk, but have purchased some colored chalk for future boards.  I found on Pinterest to write "Love" with out picking up your writing utensil.  I wanted to try it.  I wrote love first....and then thought of this cute quote.  Then played with my heart making skills, and just have fun with it. :)

For the LOVE: cursive L, the tail going up to the inside of the little "e" and then out to the outside of the "e."  Curve it back to make a "v" and then loop it off for the "o"!!

Our natural, burlap Valentine's Day!

Thursday, January 10, 2013

DIY Home Decor

First off, I, Siraya Gloudemans, am a Pinterest junkie.  
Now that I got that out of the way LOOK WHAT I DID!

I found a post for the burlap wreath and I knew I NEEDED one!


Here is my version:

I used two different verisions of burlap, both found on save-on-crafts.com.  I used the jute fabric and the burlap ribbon.  I also used some scrap fabric I found around the house including  a white sheet.  I followed the tutorial the original post had on the site for how to make the rosettes.

It is a little different that the original, but I love it.

I have been looking and looking for a small pillow in lime green for our bed. They are always so stinking expensive!  I could not justify spending that much on a pillow.  While at JoAnn this weekend for some hot glue for my class igloo (see my teacher blog), I ran across this amazing leafy green fabric.  It was on sale too!  I bought a yard knowing I could make a pillow.  I then found a fleece pillow on clearance there for only $5.95 as well!  The two together made a great pair!


I wanted to do the back with a flap that made the cover removable (like our sham pillows) because I wanted to be able to wash it with out the pillow getting lumpy (our dog, Pudge, sleeps in our room and if this falls on the floor it will be hair magnet.  Being able to wash the cover will help keep some of this off the bed).


I first hemmed the edges.  I then placed the pillow in the middle of the fabric (right side in) and pulled the fabric up on both sides.  I put a pin in where the two sides met (and over lapped) and pulled the pillow out. I then pinned around the edges of the piece that was on bottom.  I sewed from the on side pinned down to where that same flap ended on the other side.  I then pinned the other flap down and sewed around that side NOT sewing the overlap (starting right next to it).  The pillow was a little fluffier than I planned so it would not stay closed.  I found a button I had from an old project and sewed it on in the middle.  A simple button hole and we are good to go!

The PLUS side: There was enough fabric left over for 2 valences in our room (which has 2 windows!) I hemmed the three sides first (short, short, long) with small 1/4" seams.  I then sewed a 1 1/2" inch seam for the curtain rod.  Hang and done!


Not bad for 3 days after working 7.5 hours of overtime, huh?

Sunday, December 30, 2012

Winter in our WISCONSIN home

Our holiday season started off with a photo shoot with our adorable Pudgie Pie!  We bought the lights for cheap.  We wrapped pudge in them, asked him to sit in our popazon chair, covered the extension cord with a stocking, and held a treat by the camera.  The head tilt is his typical, "hungry" face.  awww we love our Pudgie Pie


To decorate for the holidays, we put white icicle lights along the roof with the plastic light hangers.  They do still work with the gutter covers.  In front of the front step, we have a spotlight shining on the house.  In the front porch light, we put a red bulb.  Finally, Alex wanted to have a "candy cane forest" so we bought the candy canes to go up our walk.  We bought these the day after Thanksgiving for 50% off, which was awesome.


I loved our winter mantle.  I kept our wedding photo up.
I bought brown beads and have then twisted and turned on the mantle.  I then did the same thing with a single set of lights.  I bought a driftwood tree at 50% off at Kohls. That is in the right hand side.  I love the old and natural look.  I have a glitter candle in the candle holder from our wedding, this is also from Kohls.  I have the same vase from our fall mantle but filled it with purple glitter fillers from Walgreens ($3).  I then hung our stockings from Kohls, and Pudge's stocking bought at a mission sale second hand for $2!  The faith and hope signs are from Walgreens last year and they were on clearance.


The vases were filled with white icicle lights on a white cord and scented pinecones.


We cut down on own tree this year.  This place is awesome because you show up, get on a horse or tractor drawn wagon and they take you to the field of trees that you are looking for.  Once you find "the one," you cut it yourself, tag it and drag it to the road. There, the wagons pick you back up.  You put the trees on one wagon and sit on the benched wagon where they bring you back to Santa's workshop. Your tree is shaken and baled and you pay based on the type of tree, not the height.  It was so much fun and we found the PERFECT tree!


We then brought the tree home to decorate!  I bought the Faith, Love, and Peace ribbons from Pottery Barn.  The tree is wrapped in burlap I bought from save-on-crafts.com.  We used warm white LED lights to light the tree.  Every year since we began dating, I have bought Alex an ornament.  These are the ornaments decorating our tree (10 including this years!)  Plus we got some special wedding ones and Pudge go one this year too!  I love our tree!

Alex is still in Pharmacy school.  He is currently in his final year, which means he is completing 6 6-week rotations.  He did the first 2 in Illinois.  He then had number three off (the fall).  This is rotation number 4 and, unfortunately, it is 2 hours away.  The hospital he is working at is providing him with FREE bed and breakfast to live in for that time, but that means he is not home with us during the week. Pudge talks to Alex on the phone (almost as much as I do!)

I went on Save-on-crafts.com and had A BLAST!  I found many things that I have been wanting to craft with.  One thing I fell in love with was this chalk board and chalkboard markers.  I have seen many blogs where people use them in a variety of ways and could not wait to get started on my own!  Here is a message we send Alex during the week.

The following week, Blizzard Brianna hit and I was home alone.  I bought my peanut butter, filled my water jugs with water and made sure I was ready to be snowed in.  They were anticipating 12-15 inches of snow so we were prepared for anything.  School was cancelled the Wednesday night for Thursday so I knew I could just get comfy and get stuff done.  Boy did I get stuff done! I cleaned, I organized, and I shoveled myself out of said blizzard (once).  Alex and I started dating when we were 15.  Since we  were so young, we obviously lived with our parents.  Then we moved to college and had maintenance crews that took care of everything.  The last blizzard that hit, we lived together.  Basically, I have never had to "fend for myself." Therefore, I was so proud of myself when I woke up at 8am, saw 5-6inches of snow that had fallen since midnight, and went and shoveled it.  I shoveled the entire driveway, sidewalk, and walkway up to the door.  I was so proud, until I realized in the process I had thrown out my back and was unable to get up.  Due to my scoliosis, my muscles do not all do their fair share of work so when I over exert myself with things such as shoveling, I can throw it out and throw it out pretty bad.  I wasn't able to move much during the rest of the day, but that didn't take away my sense of pride!


We had a wonderful white Christmas thanks to Blizzard Brianna.  We spent time with all of our families and had our first Christmas morning waking up in our own home EVER.  It was so wonderful and we truly enjoyed being home for the holidays.  Pudge was so cute in his Christmas sweater and all was merry and bright!
I found this idea on Pinterest, to tie ribbon on the cupboards and post holiday hards. Thank to save-on-crafts.com again, I had mini clothes pins I used to pin up the cards.  We have so many people who love and care about us.  It was a very merry Christmas.

Fall in our WISCONSIN Home

It was wonderful to celebrate our first fall in Wisconsin as a married couple.  We apparently live on the lot with the most trees EVER!  Even our neighbors are amazed at how many leaves we accumulate each year.  It took us raking as many leaves as you see in this pile 3 separate times and then a smaller clean up one at the very end of fall to get it all done. Pudge is NOT a fan of playing in the leves and to get this photo to coaxing, moving leaves, and much love.


I LOVE the look of a mantle.  Our house did not have a fireplace nor a mantle, so we made one!  I loved decorating the mantle according to season.  I love the look of the fall mantle I created.

The tall vases on the side were at our wedding with purple orchids in them.  My mom found these tall plants/leaves and they stick out perfectly from the top of the vase.  The small antique table also came from my mother.  I have a variety of candles on the table to look like my fire place.

The large photo is actually our large wedding guest book.  All of our wedding guests signed the frame with the engraving pens giving us this amazing centerpiece and great wedding momento to display. (Guestbook)

I purchased my vase from a small store in Greenville, SC.  This store travels the world and buys goods from the people selling them.  They then bring the goods to the United States and sell them, proceeds going back to the original seller.  I love the look of the authentic hand carved vase.  I bought some vase fillers on sale at Walmart to give the fall look.  The Indian Corn is real corn purchased at the grocery store last year.  When you keep it in a nice dry place it lasts more than a year.  I bought a fall leaf garland and draped that across the mantle.  The acorns were a gift from my mother in law, though I think they were approx. $9.

I purchased the Give Thanks turkey on sale at Walgreens on Clearance for $3.  The pumpkin is a real one from my parents garden.  The vase is from a local grocery store floral department. It is a chalkboard vase so I can write on it according to the season as well.  The flowers were actually a wedding bouquet in my friends wedding.  They were the the real touch bouquets and they are amazingly real down the small browning areas on some of the roses.

The total cost to decorate this mantle was only approx. $42 and able to be used year after year!


Our Pudgie Pie turned 5 in Septmeber. It was also his first birthday with us we we threw him a birthday party.  We got up a pupcake from the farmer's market and put a hat on and let him devour his treat.   It was a great birthday for Pudge!
Family photo on his birthday!
I found Shanty-2-Chic, an amazing DIY website.  I am in love with all they do and as my husband gets more tools, I will be doing more of their projects.  Their style is so what I want my home to look like.   They had printable banners that I thought were really cool.  I printed according to their directions and think they turned out pretty cool!

We got to do a fun fall photoshoot.  My friend Ellie is a photographer and for my birthday (25 ahhh!) she gave a mini-session.  Please check out her facebook and if you live in the Fox Cities Area, please consider contacting her! EllieFay Photography and Design.  Like her page for updates and samples of work.  Pudge was a hoot to work with.  He would stare down the camera if Ellie said "hungry."  Hungry is what our family refers to as "the 'H' word" as if he hears it he gets all riled up and excited.